How to make a bottled window panel
When I first saw walls of small buildings in New Zealand at Rainbow Valley Farm I thought they were the coolest form of wall construction I had ever seen. I had never actually built one as I had continually thought it would be problematic if the cement harden too soon during the process.
When we were building the bath house I finally gave it a go as I had played the process over in my mind and creatively found what I considered to be a good and easy process. The following process is what I have developed to create a really cheap and arty wall feature in any small structure. The panels also act as a thermal mass and can be utilized on larger wall panels. I will be trying this in the future.
Firstly, I often see resources everywhere I go and think of how I might use any of these. A local plumbing supply business discard timber frames that PVC is transported in and I immediately considered these as window panel. They also have a metal band around the outside which makes the quite sturdy. Frames can be made out of any timber to make any shape. Usually frames can be made to fit into spaces within wall stud noggins. When we made the bath house, these frames were designed to fit into the wall stud spaces all around the structure.
Before I use these recycled metal strapped frames, I chainsaw a groove on the inside of the entire frame to act as a keyway. This will allow the cement mixture to lock into the frame so it doesn't fall out. Once I have made the groove, I screw a backing board to one side of the frame. Once it is laid flat on the ground it stops the cement mixture leaking out onto the floor. The frame timbers are usually 4x2 sized and the bottles I use are usually 4 inch radius. It makes it really simple to have an even layer of bottles this way. Thicker frames will require larger diameter bottles.
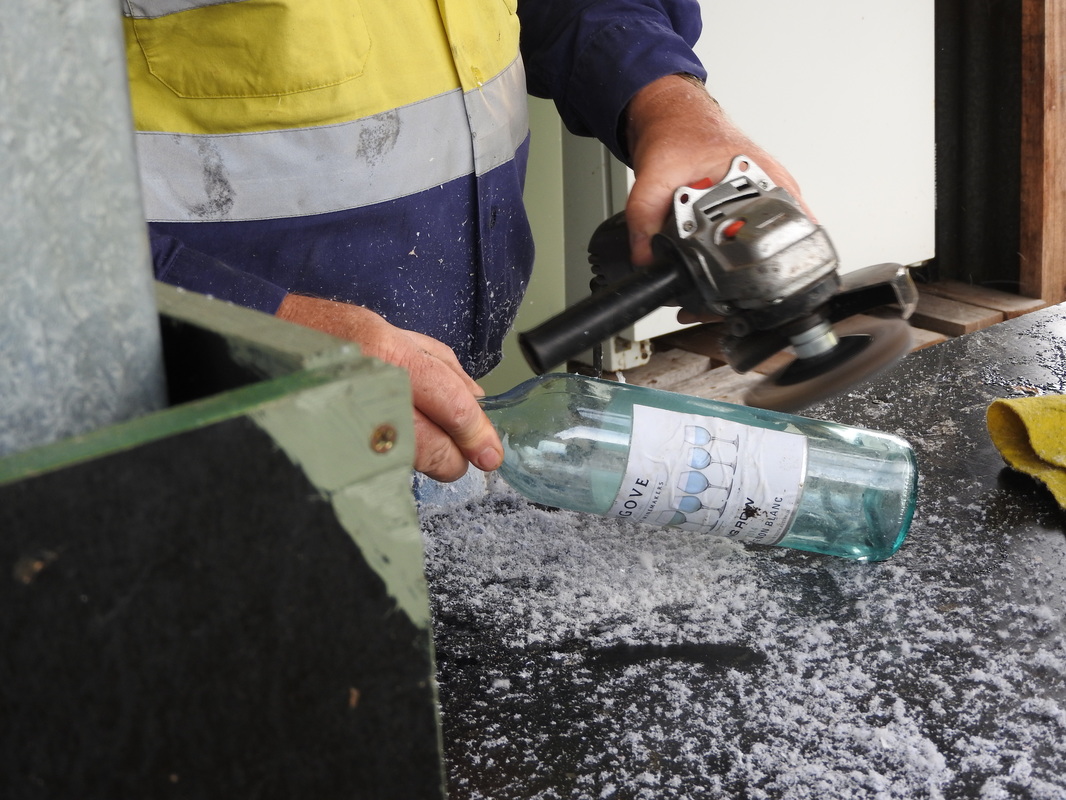
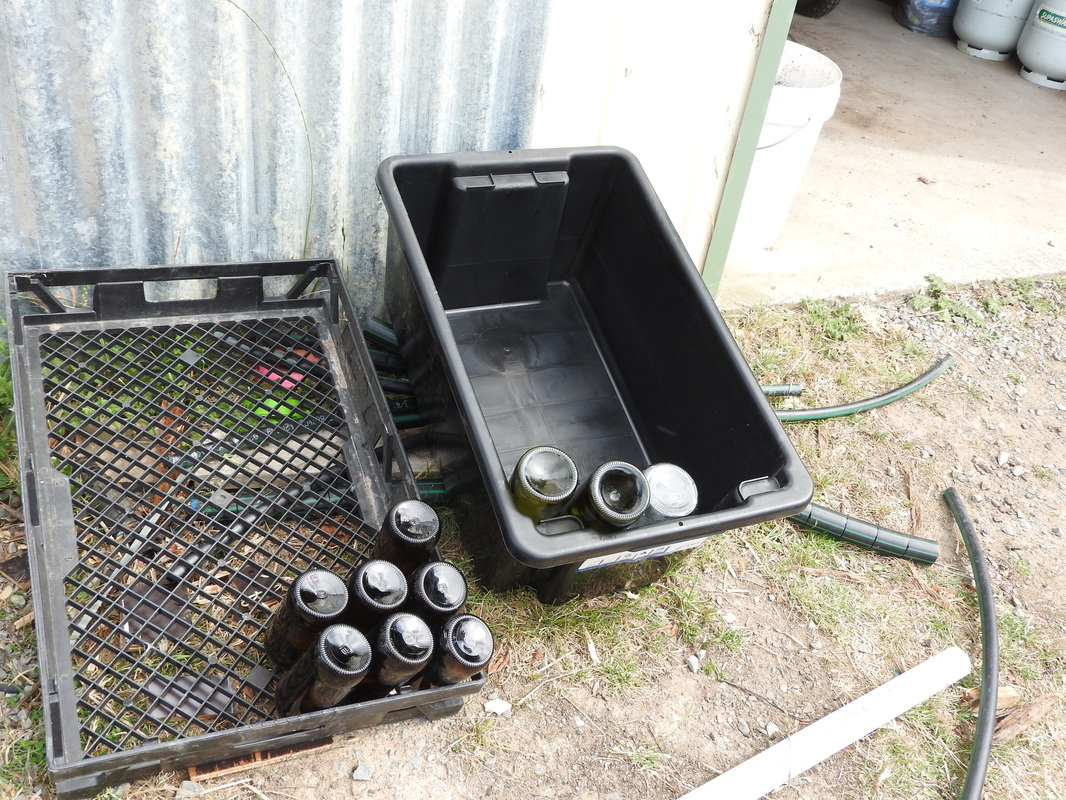
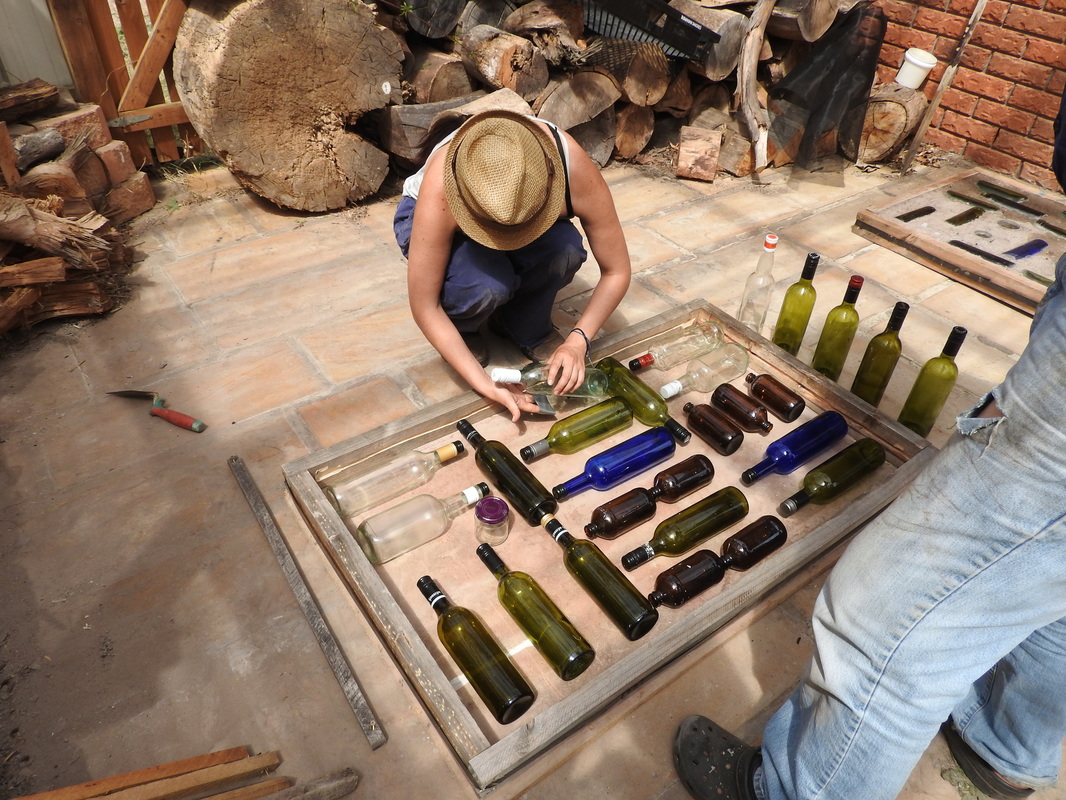
Once the frame is ready, bottles need to be selected and labels soaked and cleaned off all bottles. A good mix of light green, clear and dark green is best to let in good light. I sourced some blue bottles recently and put one or two into any new ones I make. I use a 6 inch grinder with a wire brush attachment and it deals with the most stubborn labels in good time. In the past we have soaked and scrubbed with Eucylaptus oil and labels come off with relative ease. Once the bottles are cleaned, they need to dry upside down. If bottles have any moisture inside once they are capped and put in the frame the moisture will return on hot days and fog up the bottle. Once dry, put the cap back on the bottle or plug it in some way to avoid getting cement mixture inside the bottle.
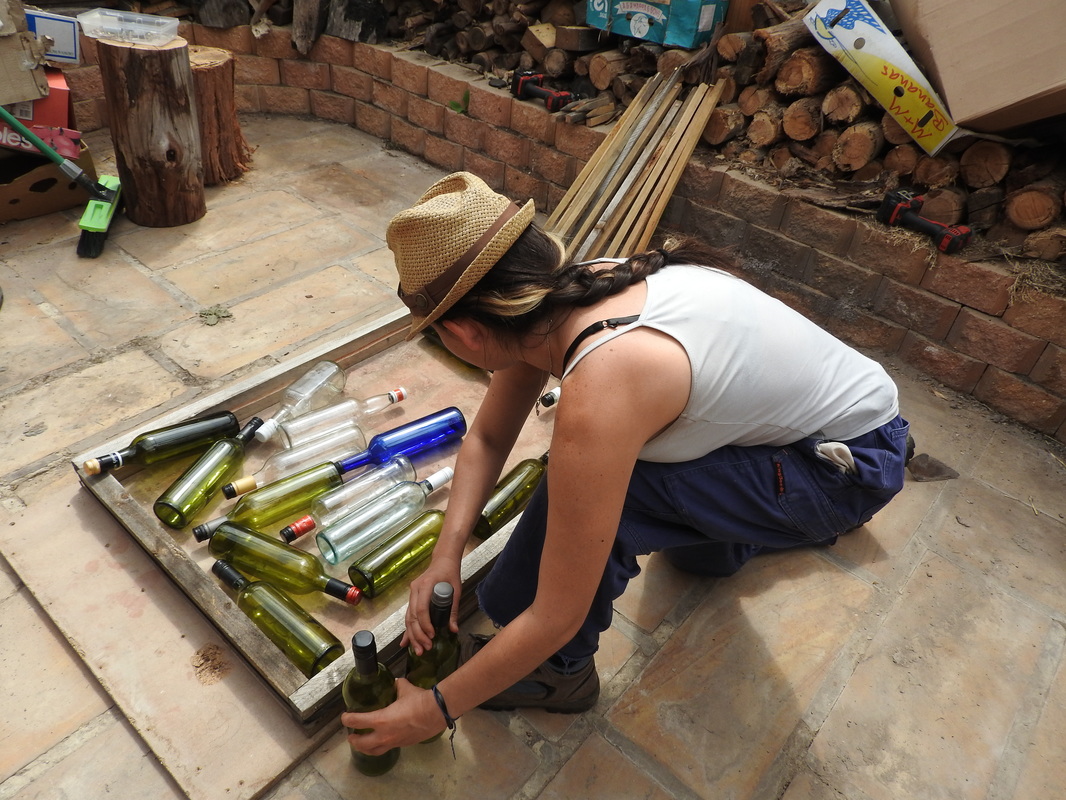
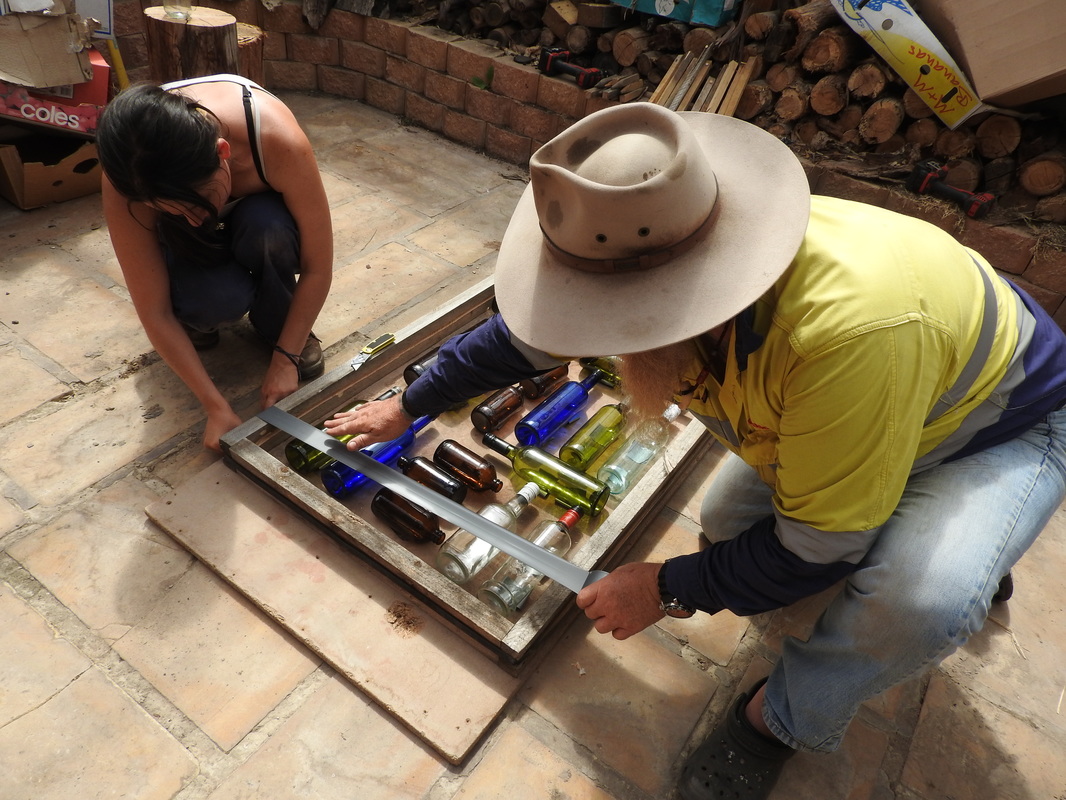
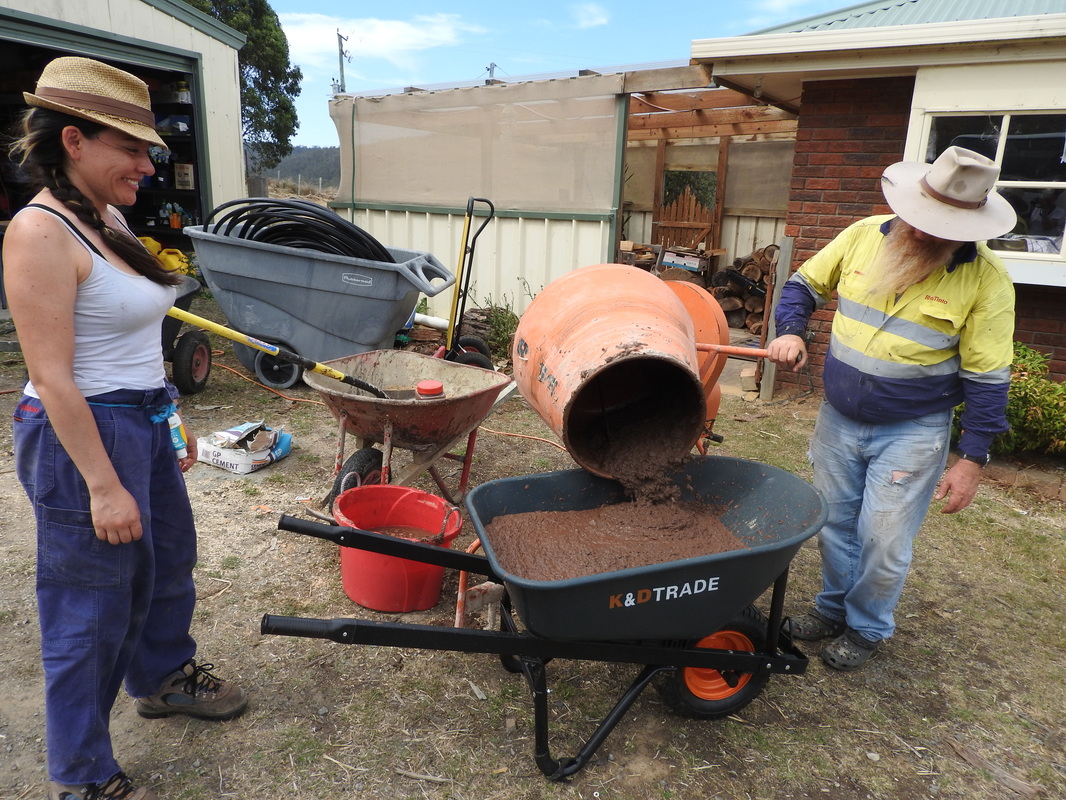
During this build I had two volunteers, Carolina (Chile) and Tugce (Turkey) I was teaching the technique to. Tugce on camera, Carolina on the tools. Both ladies selected the ottle position design to suit themselves. The only criteria was not to have clear bottles on the as it will go into the bath house so I don't want it possible for anyone to see thru while someone is bathing.
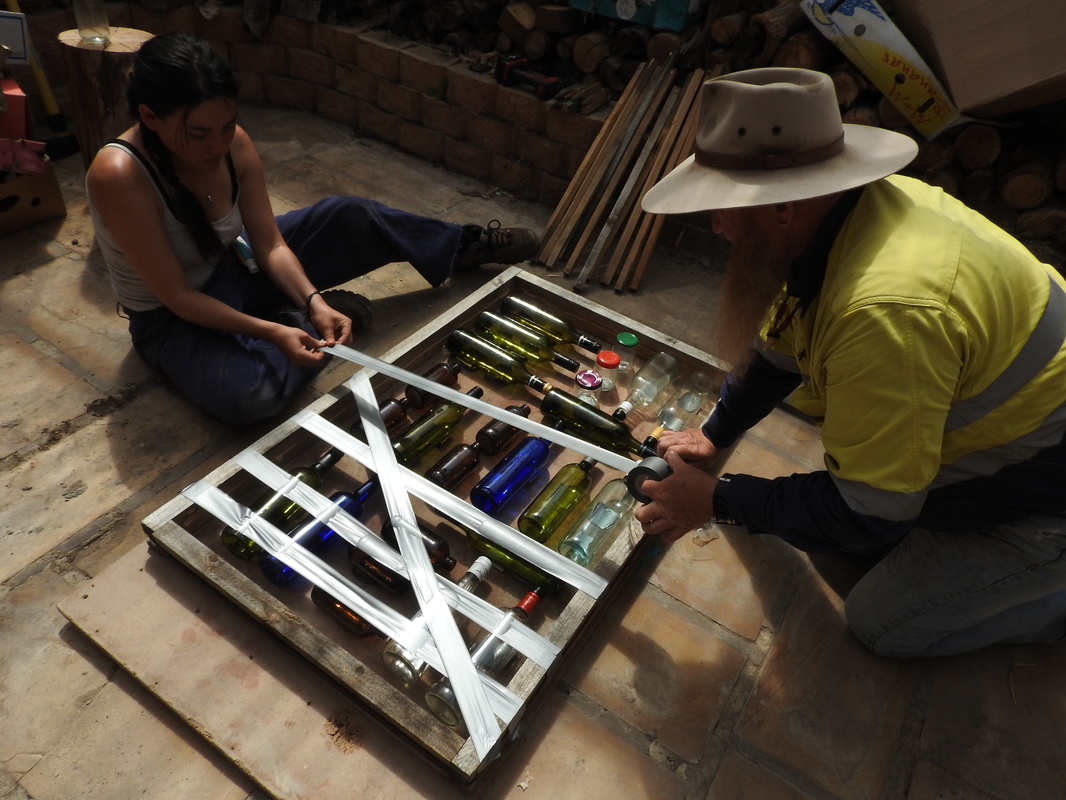
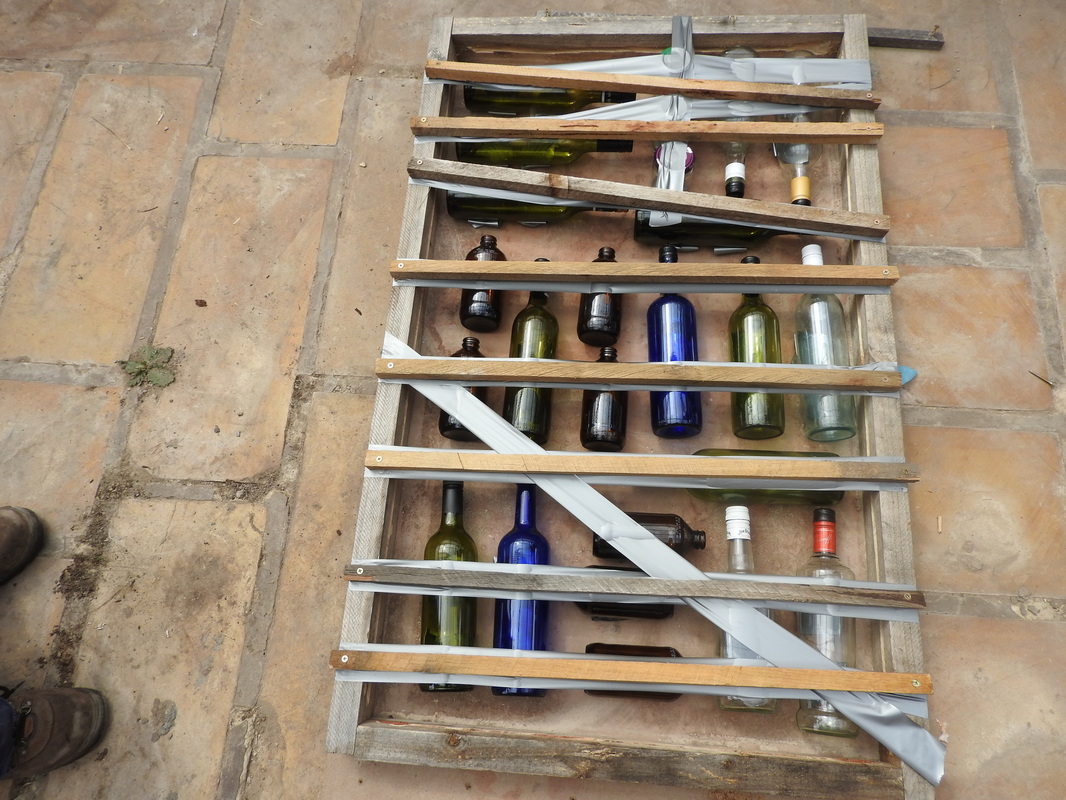
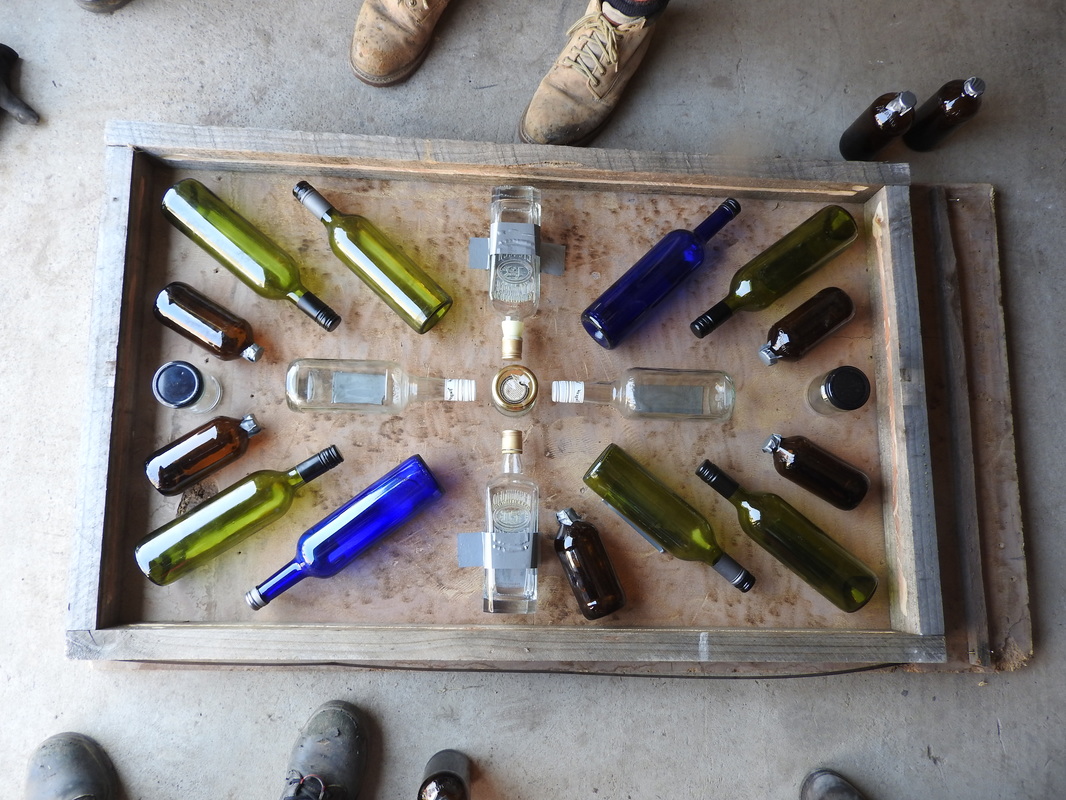
With all the bottles laid out, we then secure the bottles to the backing board with duct tape so it is looped with sticky part out. Firstly the down side of the bottle is tacked down and then the upper side of the bottles are duct taped across the entire width so they won't roll when in contact with the cement mixture. To hold the bottles down, I secure the bottles with a stake screwed to the edges of the frame. In a previous attempt we found that the bottles wanted to float out of the cement mixture. On average, 20 bottles fit into the frames I use. With some creative design 22 bottles will also fit. The more bottles, the lighter the final product. Bottles just have to have adequate mix between each bottle. I also prefer bottles with a deep divit in the bottom. This allows the cement mixture in for security.
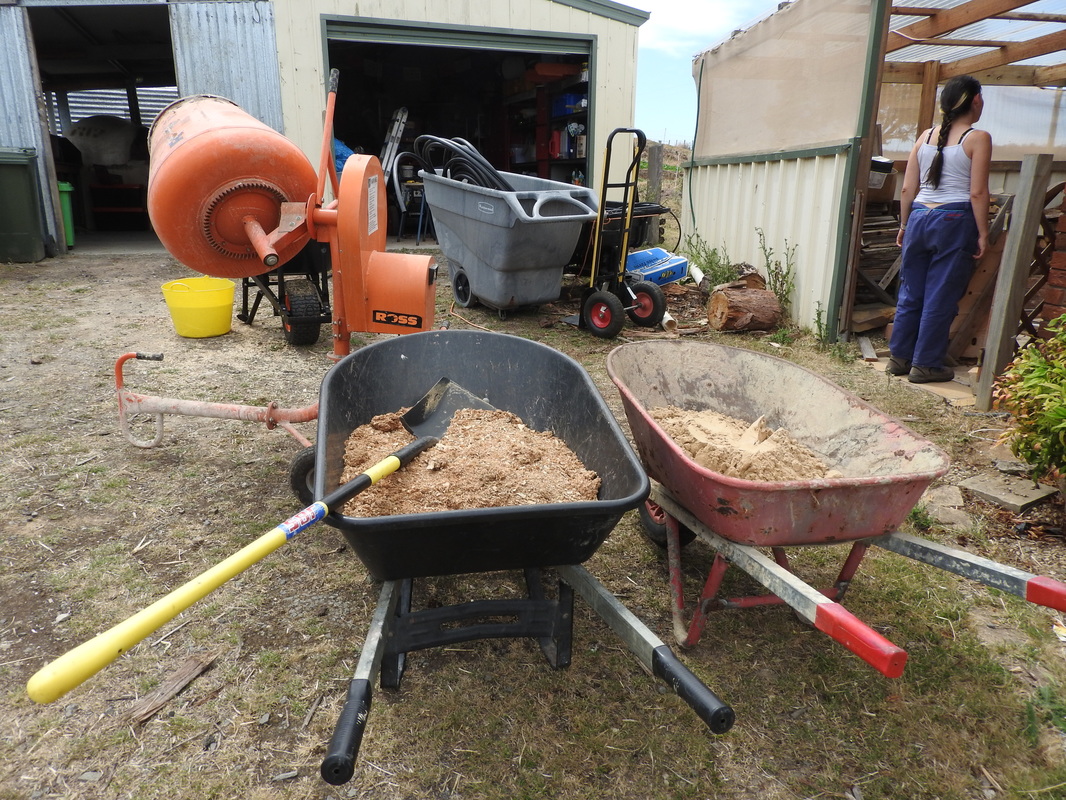
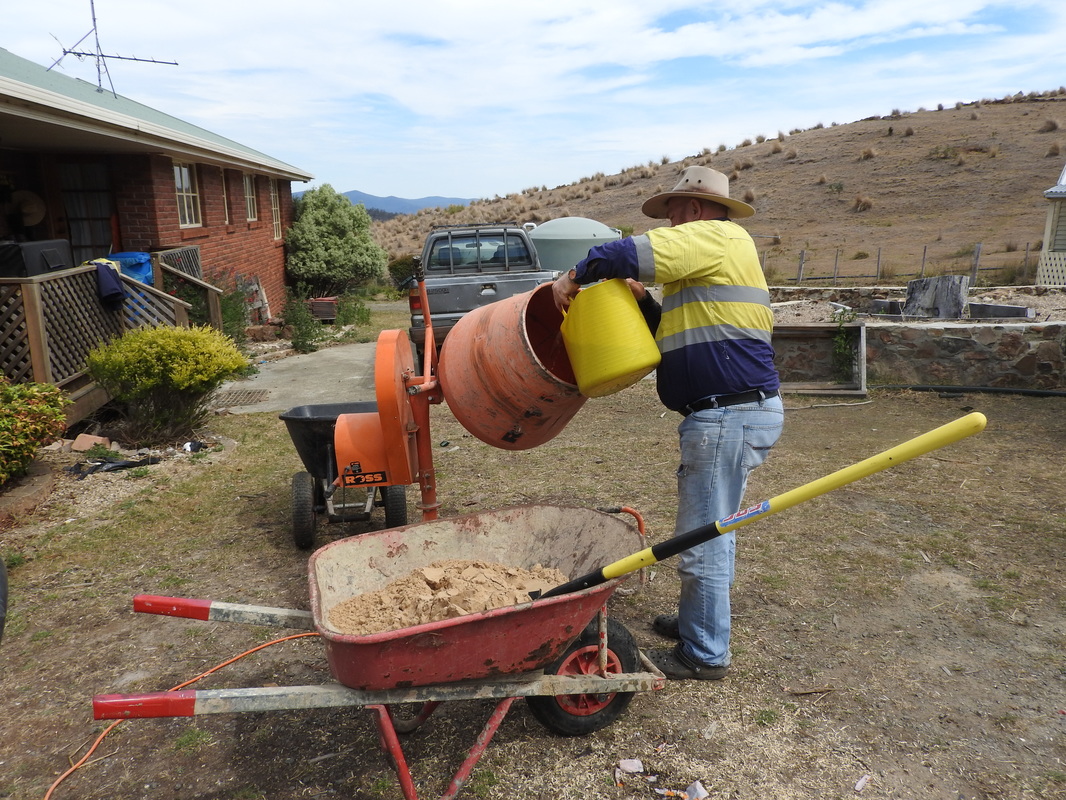
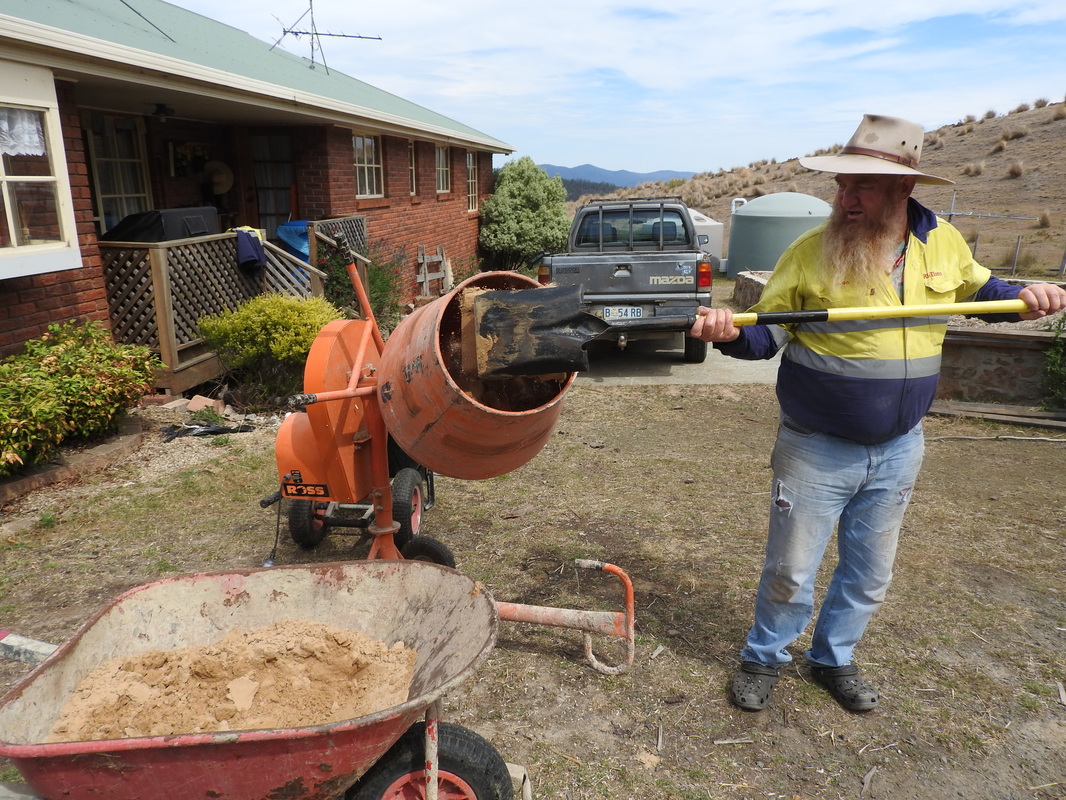
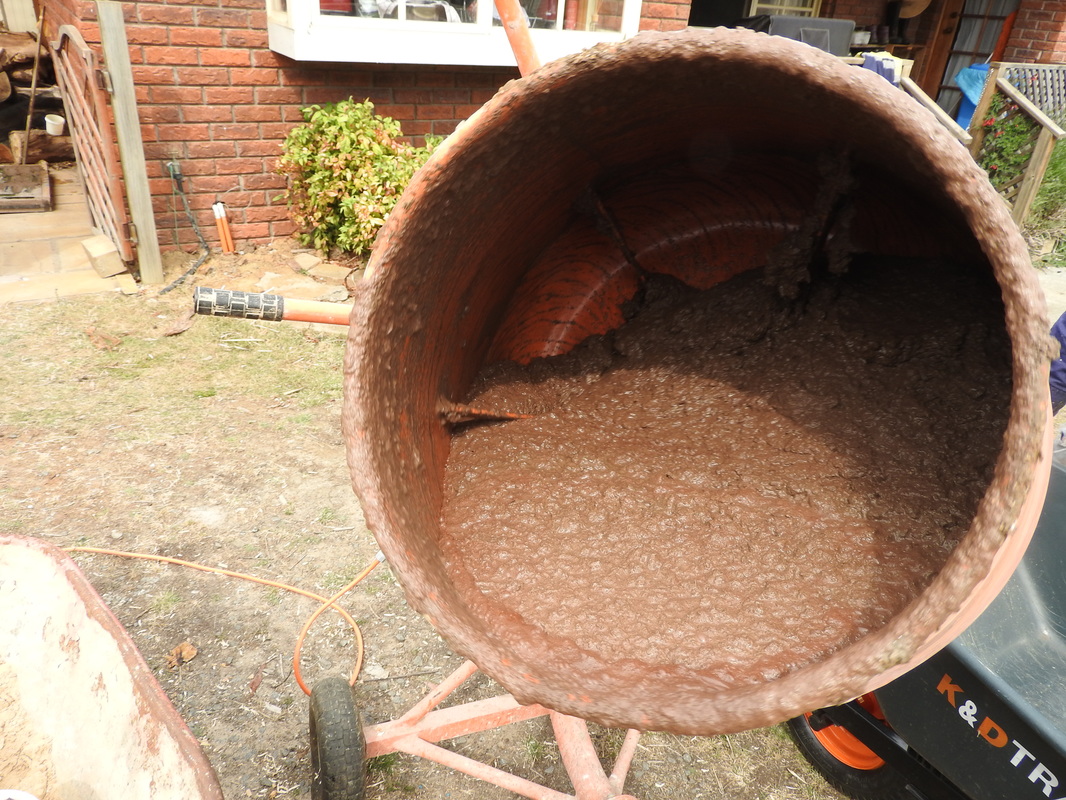
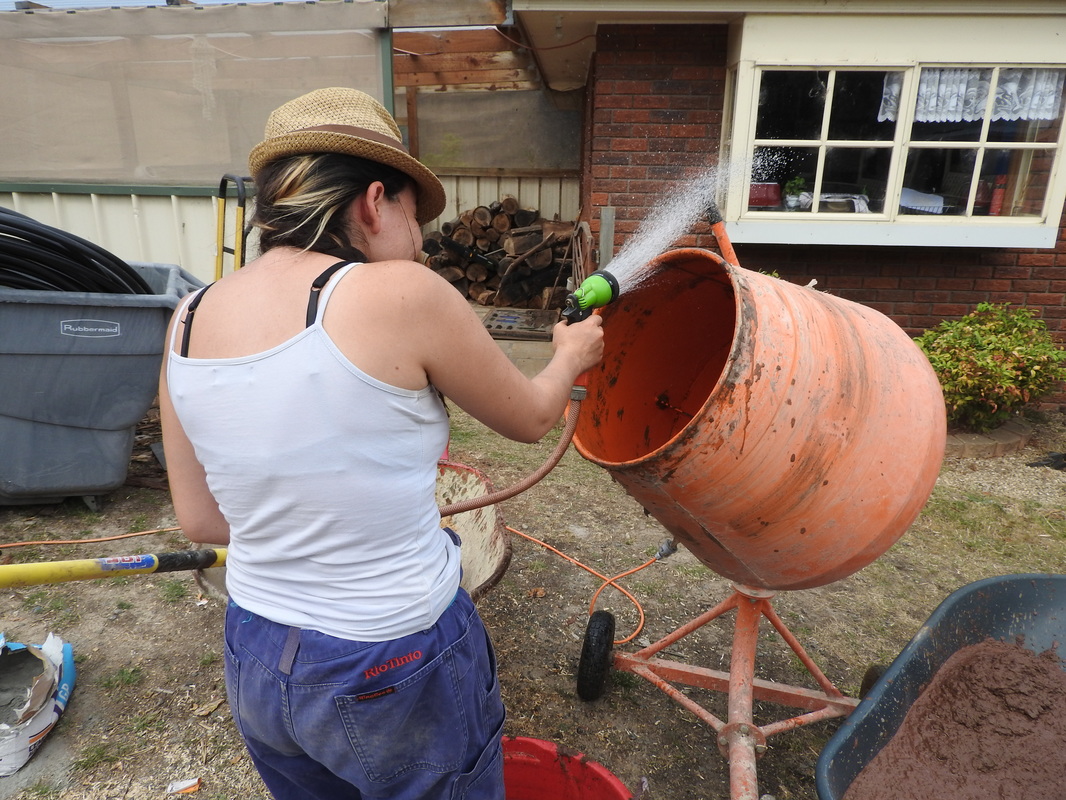
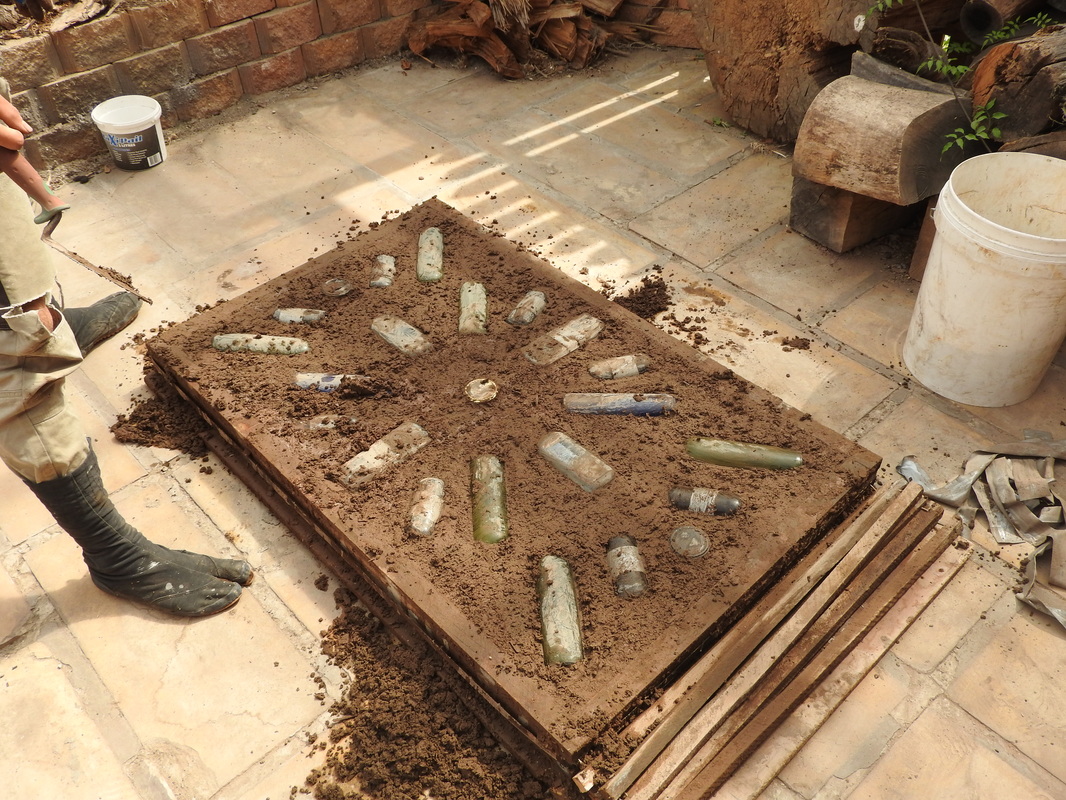
Once the bottles are secure in the frame, all the other resources need to be gathered for making the mix to hold the bottles in the frame. I use sand, sawdust and cement. A mis of 4 x sand, 8 x sawdust and 1x cement is a good mix but a bit less sawdust can give a good result as well. The frames I use, with 20 bottles allows for 1 and a 1/2 of the mix measurement, ie 6 x sand, 12 x sawdust and for good measure 2 x cement. These measures are even shovel measures. It all goes into the cement mixer with adequate water to soak the sawdust and be wet enough that it will pour easy. I also add some oxide coloring to avoid the need to paint the infill.
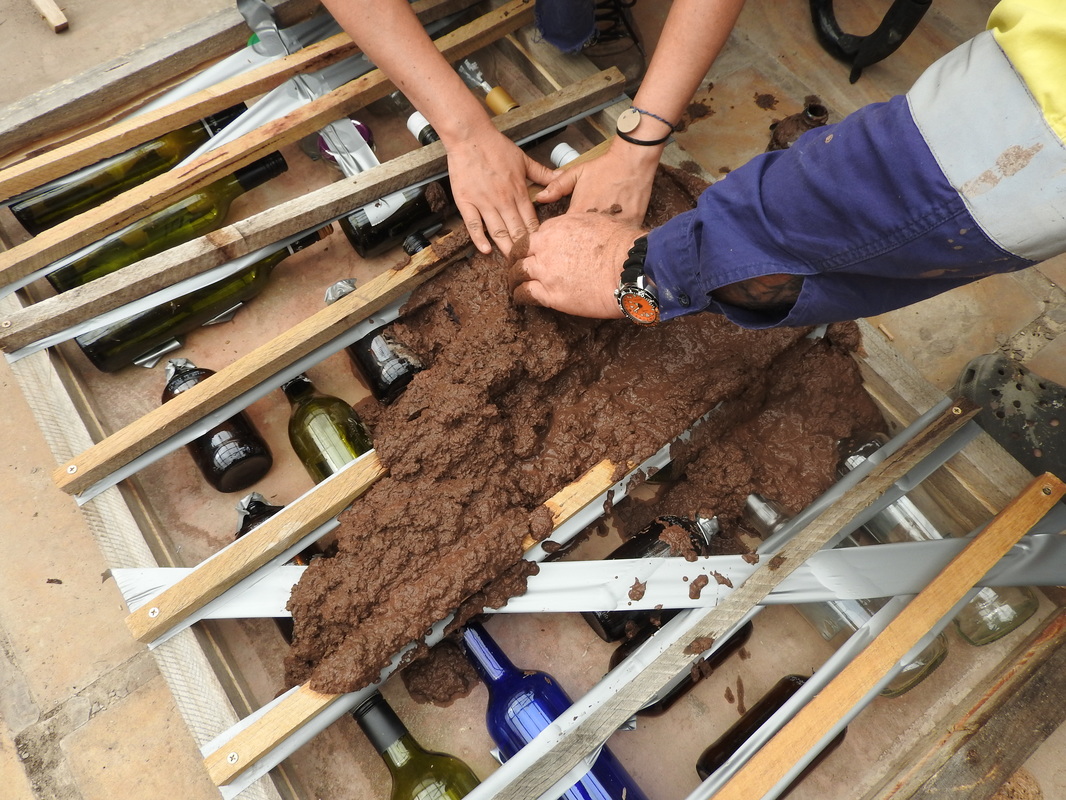
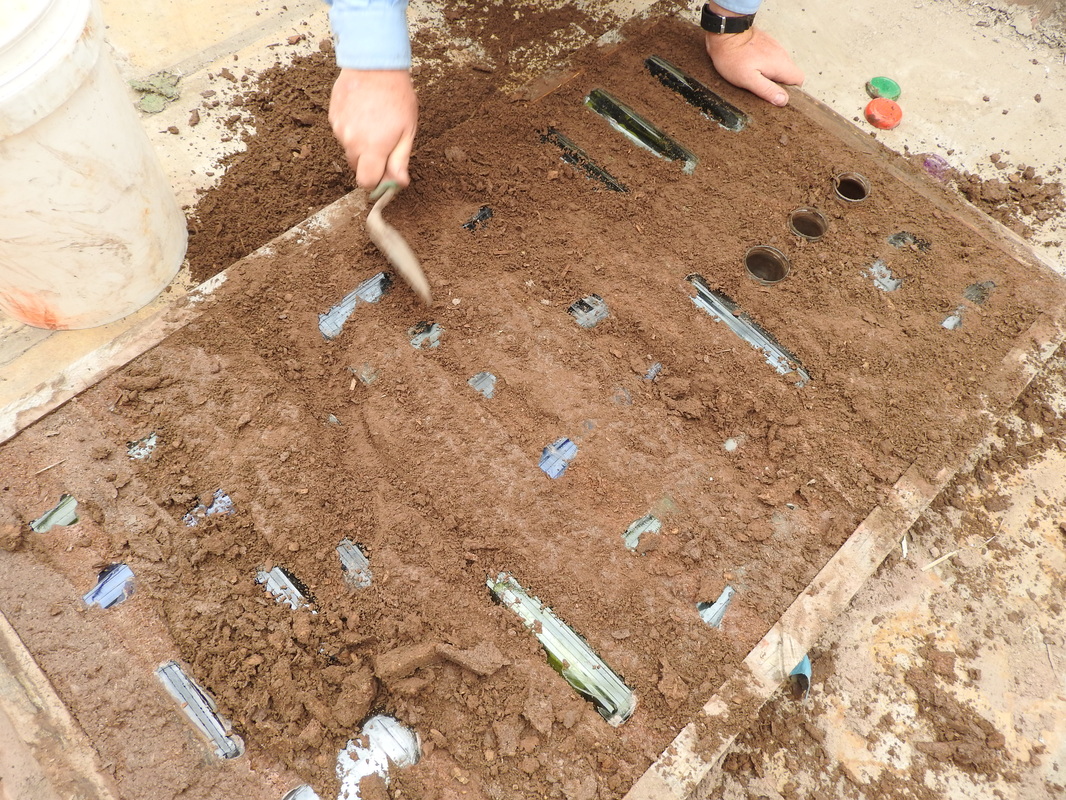
The mixis the taken to the frame and shoveled inaround the bottles, being careful not to rush and disturb the bottles from their resting place. Hands and fingers need to be used to get the mixture into all areas especially into the keyway. If the mix is too dry, it will not cover the undersurface of the bottles as I found in my last window.
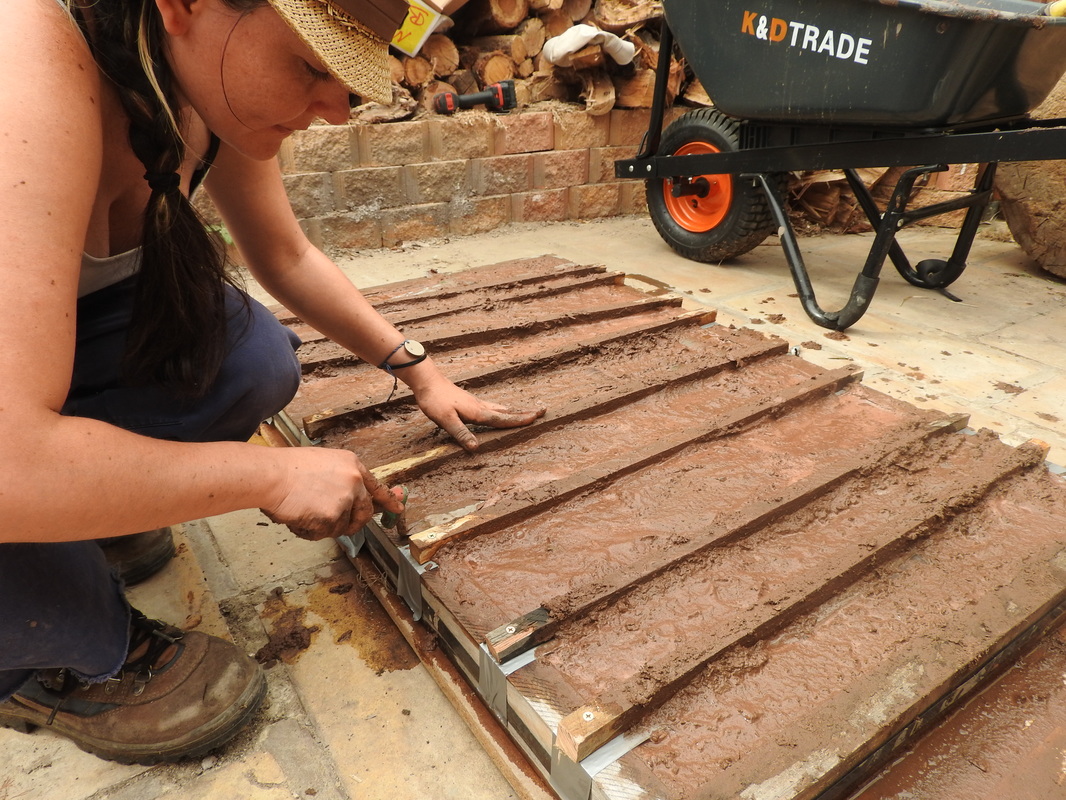
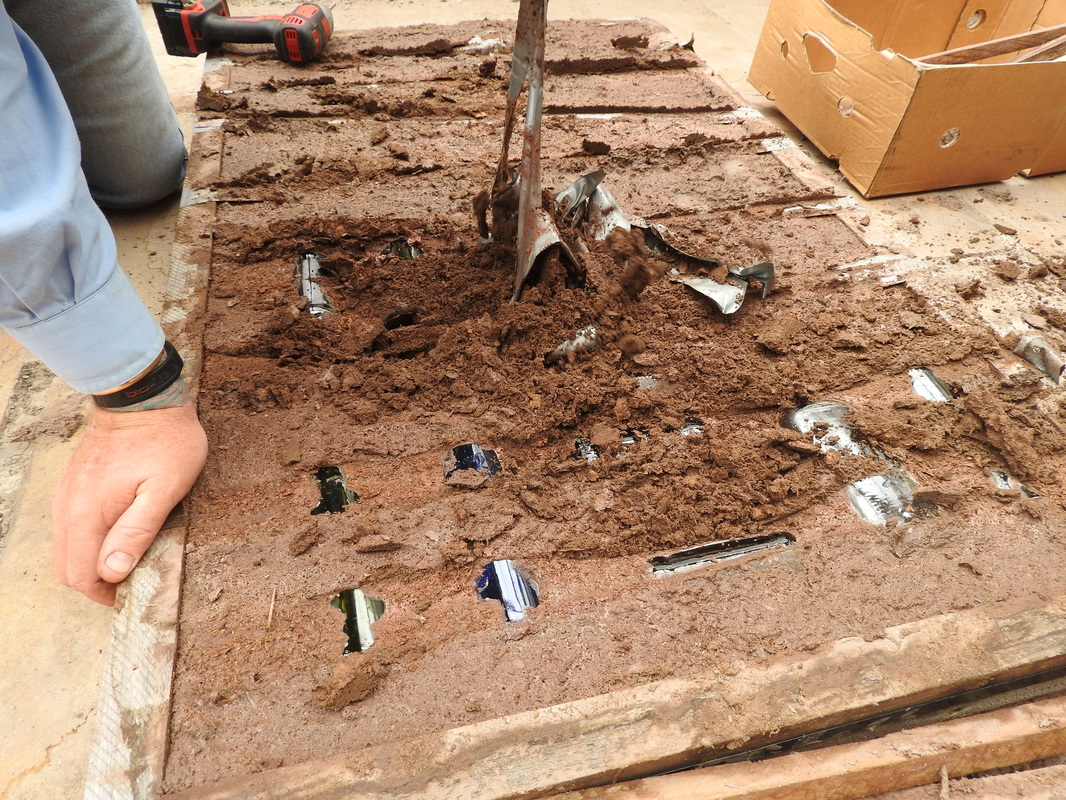
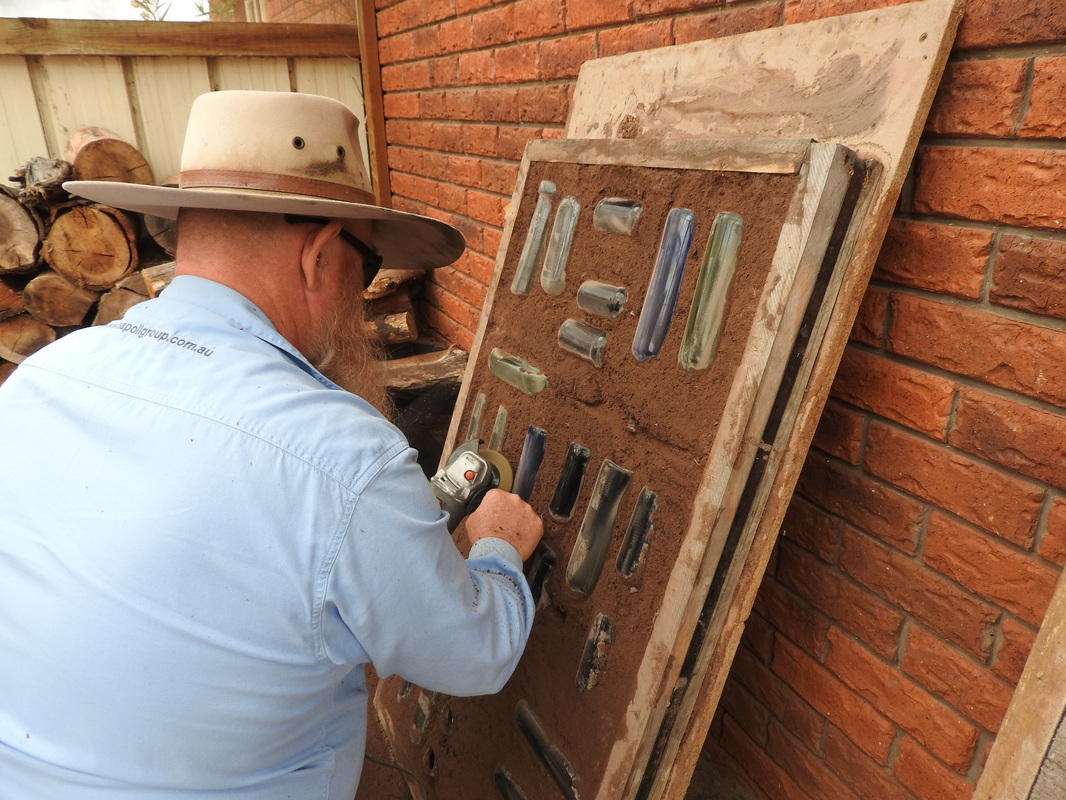
The mix is left for a day to dry and the stakes and tape are removed. With a trowel, I scrape away all the excess dried material to expose the bellies of the bottles being careful not to disturb the full width of the bottle. The cement mixture holds the side belly, neck and bottom divit of the bottles so always be carefull not to remove too much material at first. Once done roughly with the trowel, I then use the gringer with the wire brush to form the final shape of the material between the bottles creating a nice natural form. I have found that the material can get drier and the wire brush will still chew away the hard material with ease. Once the grinder has removed the bulk, I use a brush with water to smooth off and round out all the rough places and then the bottles can be cleaned again. Best to wait till the mis is fully dry otherwise the bottles will continually get smeered with wet cement mixture.
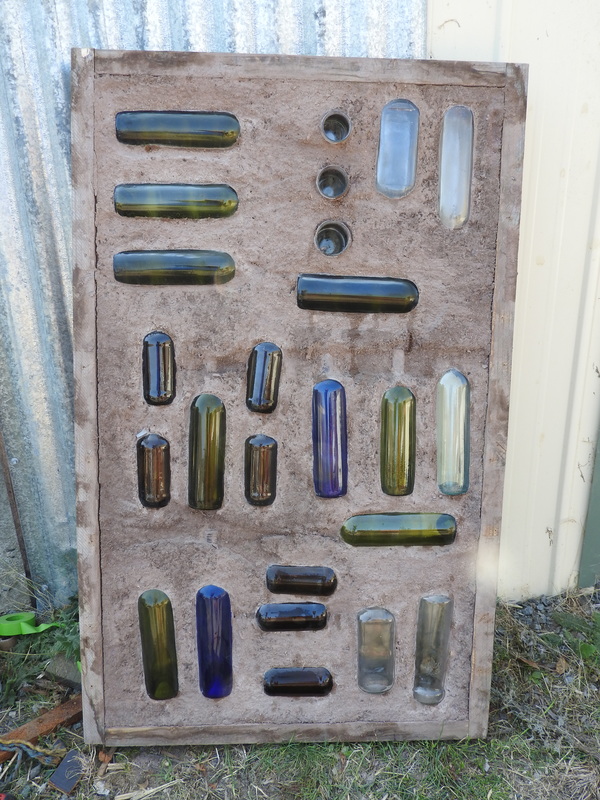
Wella, a new window.
When we were building the bath house I finally gave it a go as I had played the process over in my mind and creatively found what I considered to be a good and easy process. The following process is what I have developed to create a really cheap and arty wall feature in any small structure. The panels also act as a thermal mass and can be utilized on larger wall panels. I will be trying this in the future.
Firstly, I often see resources everywhere I go and think of how I might use any of these. A local plumbing supply business discard timber frames that PVC is transported in and I immediately considered these as window panel. They also have a metal band around the outside which makes the quite sturdy. Frames can be made out of any timber to make any shape. Usually frames can be made to fit into spaces within wall stud noggins. When we made the bath house, these frames were designed to fit into the wall stud spaces all around the structure.
Before I use these recycled metal strapped frames, I chainsaw a groove on the inside of the entire frame to act as a keyway. This will allow the cement mixture to lock into the frame so it doesn't fall out. Once I have made the groove, I screw a backing board to one side of the frame. Once it is laid flat on the ground it stops the cement mixture leaking out onto the floor. The frame timbers are usually 4x2 sized and the bottles I use are usually 4 inch radius. It makes it really simple to have an even layer of bottles this way. Thicker frames will require larger diameter bottles.
Once the frame is ready, bottles need to be selected and labels soaked and cleaned off all bottles. A good mix of light green, clear and dark green is best to let in good light. I sourced some blue bottles recently and put one or two into any new ones I make. I use a 6 inch grinder with a wire brush attachment and it deals with the most stubborn labels in good time. In the past we have soaked and scrubbed with Eucylaptus oil and labels come off with relative ease. Once the bottles are cleaned, they need to dry upside down. If bottles have any moisture inside once they are capped and put in the frame the moisture will return on hot days and fog up the bottle. Once dry, put the cap back on the bottle or plug it in some way to avoid getting cement mixture inside the bottle.
During this build I had two volunteers, Carolina (Chile) and Tugce (Turkey) I was teaching the technique to. Tugce on camera, Carolina on the tools. Both ladies selected the ottle position design to suit themselves. The only criteria was not to have clear bottles on the as it will go into the bath house so I don't want it possible for anyone to see thru while someone is bathing.
With all the bottles laid out, we then secure the bottles to the backing board with duct tape so it is looped with sticky part out. Firstly the down side of the bottle is tacked down and then the upper side of the bottles are duct taped across the entire width so they won't roll when in contact with the cement mixture. To hold the bottles down, I secure the bottles with a stake screwed to the edges of the frame. In a previous attempt we found that the bottles wanted to float out of the cement mixture. On average, 20 bottles fit into the frames I use. With some creative design 22 bottles will also fit. The more bottles, the lighter the final product. Bottles just have to have adequate mix between each bottle. I also prefer bottles with a deep divit in the bottom. This allows the cement mixture in for security.
Once the bottles are secure in the frame, all the other resources need to be gathered for making the mix to hold the bottles in the frame. I use sand, sawdust and cement. A mis of 4 x sand, 8 x sawdust and 1x cement is a good mix but a bit less sawdust can give a good result as well. The frames I use, with 20 bottles allows for 1 and a 1/2 of the mix measurement, ie 6 x sand, 12 x sawdust and for good measure 2 x cement. These measures are even shovel measures. It all goes into the cement mixer with adequate water to soak the sawdust and be wet enough that it will pour easy. I also add some oxide coloring to avoid the need to paint the infill.
The mixis the taken to the frame and shoveled inaround the bottles, being careful not to rush and disturb the bottles from their resting place. Hands and fingers need to be used to get the mixture into all areas especially into the keyway. If the mix is too dry, it will not cover the undersurface of the bottles as I found in my last window.
The mix is left for a day to dry and the stakes and tape are removed. With a trowel, I scrape away all the excess dried material to expose the bellies of the bottles being careful not to disturb the full width of the bottle. The cement mixture holds the side belly, neck and bottom divit of the bottles so always be carefull not to remove too much material at first. Once done roughly with the trowel, I then use the gringer with the wire brush to form the final shape of the material between the bottles creating a nice natural form. I have found that the material can get drier and the wire brush will still chew away the hard material with ease. Once the grinder has removed the bulk, I use a brush with water to smooth off and round out all the rough places and then the bottles can be cleaned again. Best to wait till the mis is fully dry otherwise the bottles will continually get smeered with wet cement mixture.
Wella, a new window.